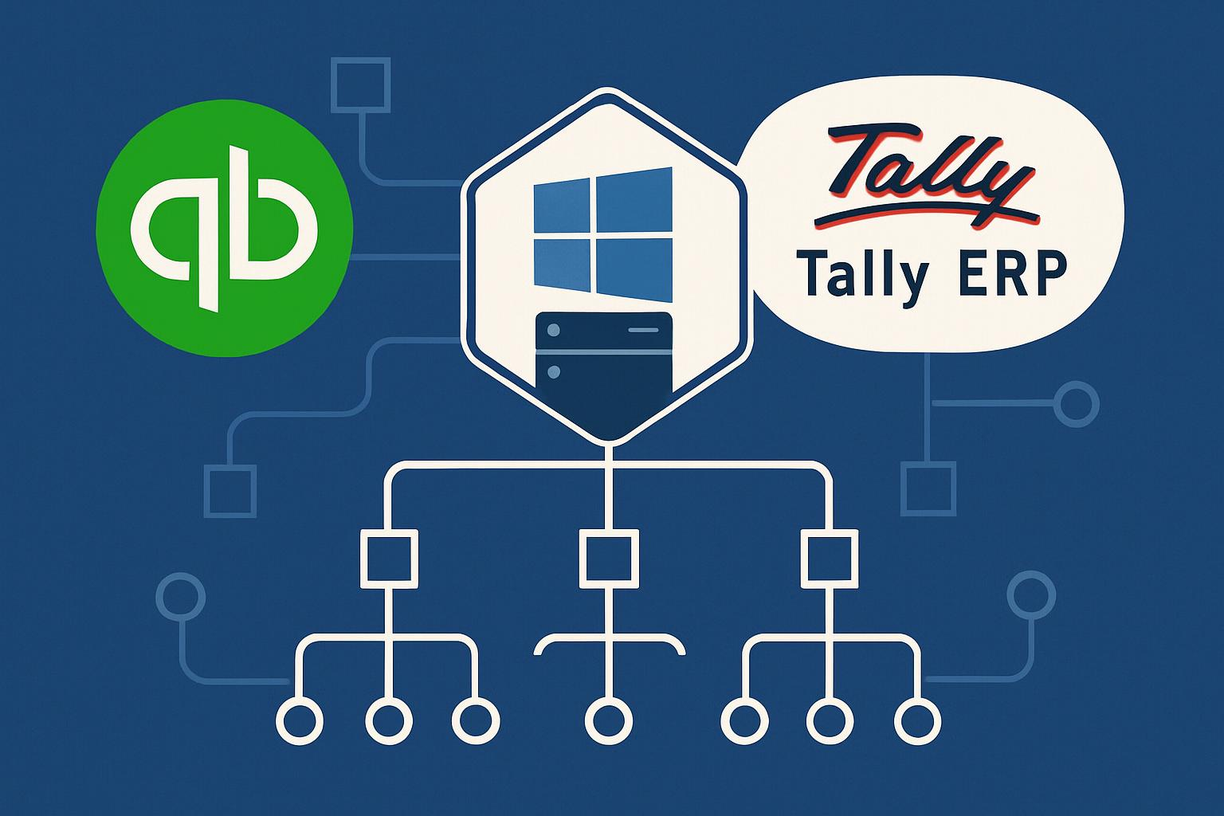
– Hero image combining QuickBooks and Tally logos with folder sharing icons)
Karibu tena! If you’ve been following our series, you know we’ve covered the essentials: getting your Windows Server expertly set up, establishing reliable folder sharing, understanding professional accounting software integration, and enabling secure remote access. Now, let’s get down to the nitty-gritty for many Tanzanian businesses: the specific steps and considerations for setting up two of the most popular accounting packages – QuickBooks (Desktop versions) and Tally ERP – to work effectively in a multi-user environment using folder sharing on your Windows Server.
Getting this setup right is crucial. You want your team members (accountants, managers, sales staff who need access) to be able to work in QuickBooks or Tally simultaneously, accessing the shared company data file stored securely on the server, without running into constant errors, slowdowns, or data conflicts. It’s about moving from a single-user bottleneck or a problematic peer-to-peer sharing attempt to a streamlined, server-managed workflow.
While we touched upon the why in Post 3, this article focuses on the how. We’ll walk through the recommended setup procedures for both QuickBooks Desktop (Premier, Enterprise) and Tally ERP (specifically TallyPrime with a Gold license for multi-user) when using a Windows Server for data hosting and folder sharing. We’ll highlight key configuration steps, common pitfalls specific to each software, and best practices to ensure a smooth and reliable experience for your Tanzanian team.
My name is Israel Ngowi, and I have hands-on experience helping businesses across Tanzania configure QuickBooks and Tally ERP correctly on Windows Server environments. I understand the specific technical steps required and how to troubleshoot common issues that arise in our local setups. My goal is to ensure your accounting software works for you, not against you.
Ready to learn the practical steps for setting up QuickBooks and Tally ERP for multi-user success on your server? Let’s dive into the specifics!
Setting Up QuickBooks Desktop (Premier/Enterprise) on Windows Server
QuickBooks Desktop, especially the Premier and Enterprise editions popular among Tanzanian businesses needing multi-user capabilities, requires a specific setup methodology when hosted on a Windows Server. Here’s the recommended approach:
Server Ready: Ensure your Windows Server is properly set up, updated, and joined to your network (as covered in Post 1).
Dedicated User (Optional but Recommended): Consider creating a dedicated Windows user account specifically for running the QuickBooks Database Server Manager (QBDSM) service. This avoids issues related to admin password changes or user account deletions.
Shared Folder: Create a dedicated shared folder on the server where the QuickBooks Company File (.qbw) will reside (e.g., \\ServerName\QBData).
Permissions: Configure NTFS permissions on this folder meticulously (as discussed in Post 2):
The QBDSM service user needs Full Control.
The Windows user group containing your QuickBooks users (e.g., QB_Users Global Group added to a QBData_Modify Domain Local Group) needs at least Modify permissions.
Keep Share Permissions simpler (e.g., Authenticated Users with Change or Full Control).
St 2: Install QuickBooks Database Server Manager (QBDSM) ONLY on the Server
Run the QuickBooks Desktop installer on the Server.
Choose the Custom and Network Options during installation.
Select the option: “I will NOT be using QuickBooks on this computer. I will be storing our company file here so it can be shared over our network…” This installs only the QBDSM components, not the full QuickBooks application.
Complete the installation.
St 3: Configure QuickBooks Database Server Manager (QBDSM)
Open the QBDSM tool on the server.
Scan Folders: Add the shared folder you created (\\ServerName\QBData or the local path on the server like D:\QBData) to the list of scanned folders. QBDSM needs to monitor this location for company files.
Start Service: Ensure the QBDSM service is running (usually starts automatically, but verify).
4: Install QuickBooks Desktop Application on Workstations
Run the QuickBooks Desktop installer on each workstation that needs access.
Choose the Custom and Network Options.
Select the option: “I will be using QuickBooks on this computer.” This installs the full application.
Complete the installation.
5: Configure Firewall Ports
QuickBooks requires specific ports to be open on the Server’s firewall for multi-user communication. These ports depend on the QuickBooks version (e.g., QuickBooks 2020 uses different ports than 2023). You can find the specific port numbers in QuickBooks support documentation or within the QBDSM tool itself (QuickBooks Database Server Manager -> Ports tab -> Firewall Ports).
Create inbound rules in the Windows Defender Firewall (or your third-party firewall) on the server to allow traffic on these specific ports for the QuickBooks application/services.
Ensure client firewalls also allow outbound communication on these ports if necessary.
Step 6: Open and Configure the Company File
Move File: Place your QuickBooks Company File (.qbw) into the shared folder on the server (\\ServerName\QBData).
Open from Workstation: On a workstation, open QuickBooks.
Go to File > Open or Restore Company.
Select Open a company file and click Next.
IMPORTANT: Browse to the company file using the Network Path (UNC path), e.g., \\ServerName\QBData\YourCompanyFile.qbw. Do not use a mapped drive letter, as this can cause issues.
Log in to the company file.
Enable Multi-User Hosting: Go to File > Switch to Multi-user Mode. QuickBooks should now connect to the QBDSM on the server to enable multi-user access.
Repeat the process of opening the file via the network path on other workstations.
Key Considerations & Troubleshooting
Hosting Mode: Ensure hosting is ONLY enabled on the server via QBDSM. Check File > Utilities on workstations; the option should be “Switch to Multi-user Mode,” not “Host Multi-User Access.”
QBDSM Service: Verify the QBDSM service is running on the server (check services.msc).
Firewall: Double-check firewall ports on the server and clients.
Permissions: Incorrect NTFS permissions are a common cause of H202/H606 errors.
Network Path: Always use the UNC path (\\ServerName\ShareName) to open the file from workstations.
Following these steps carefully provides a stable foundation for multi-user QuickBooks Desktop access on your Windows Server in Tanzania.
Setting Up Tally ERP (TallyPrime Gold) on Windows Server
Tally ERP, particularly TallyPrime using a Gold (multi-user) license, also benefits significantly from being hosted on a Windows Server. The setup differs slightly from QuickBooks but follows similar principles of centralization and proper configuration.
– Flowchart illustrating Tally multi-user setup)
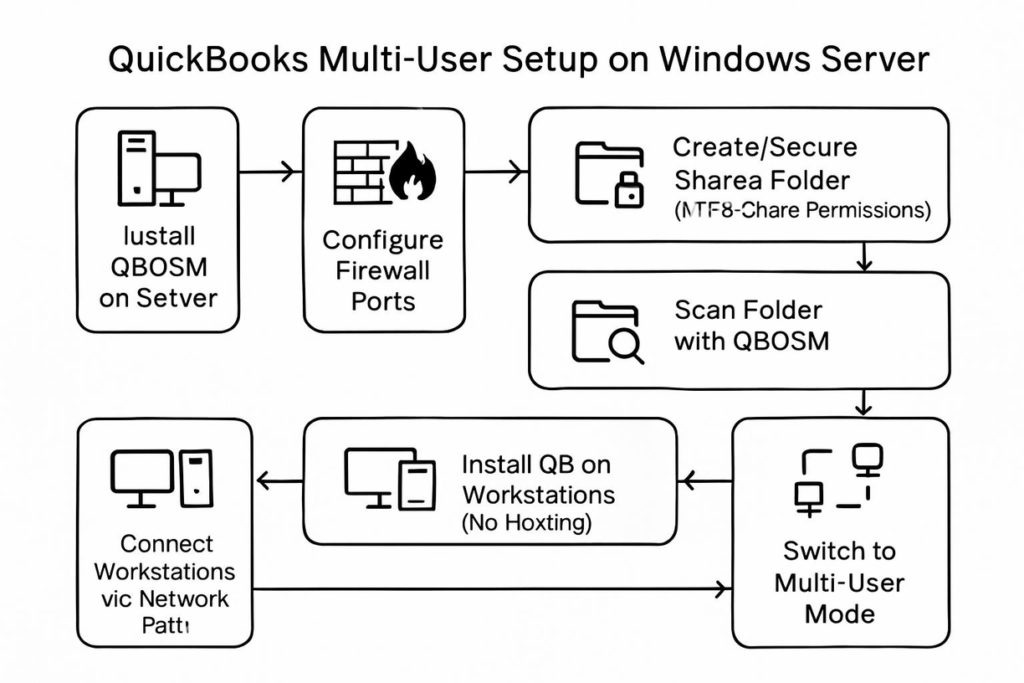
Step 1: Prepare the Server Environment
Server Ready: Ensure your Windows Server is set up, updated, and networked (Post 1).
Shared Data Folder: Create a dedicated shared folder on the server to store the Tally data (e.g., \\ServerName\TallyData). Using a fast drive (SSD) for this folder is highly recommended for performance (see Post 10).
Permissions: Configure NTFS permissions on this data folder (Post 2):
The Windows user group containing your Tally users (e.g., Tally_Users Global Group added to TallyData_Modify Domain Local Group) needs at least Modify permissions.
Ensure system/administrator accounts have necessary permissions.
Keep Share Permissions simple (e.g., Authenticated Users with Change or Full Control).
2: Install TallyPrime Server Components (Recommended for Gold License)
While Tally Gold can work using just folder sharing, for optimal performance and data consistency in demanding multi-user environments, installing the TallyPrime Server components on the Windows Server is highly recommended.
Run the TallyPrime Server installer on the Server.
Follow the installation prompts to install the TallyPrime Server service.
This service helps manage concurrent data access more efficiently than relying solely on Windows file sharing.
3: Install TallyPrime Application on Server & Workstations
Run the TallyPrime installer on the Server (installing the application itself, not just the server component if you chose that route).
Run the TallyPrime installer on each workstation that needs access.
4: Configure Tally Data Path
On the Server:
Open TallyPrime on the server.
Go to Alt+K (Company) > Select > Specify Path.
Enter the local path to the data folder (e.g., D:\TallyData).
Alternatively, configure the Tally Gateway Server (if TallyPrime Server is installed) to serve data from this location.
On Workstations:
Open TallyPrime on a workstation.
Go to Alt+K (Company) > Select > Specify Path.
Enter the Network Path (UNC path) to the data folder on the server (e.g., \\ServerName\TallyData). Do not use mapped drive letters.
Tally should now list the company files located in the server’s data folder.
5: Configure Firewall Ports
TallyPrime uses specific ports for communication, especially if using Tally Gateway Server or for license server communication.
Common ports include 9999 (for Tally Gateway Server data) and 9996 (for the license server).
Create inbound rules in the Windows Defender Firewall on the Server to allow traffic on these ports for the Tally application/services.
Ensure client firewalls also allow necessary outbound/inbound communication.
6: Activate License (Server-Based)
For a Tally Gold license in a multi-user environment, it’s typically best to activate the license on the Server.
Configure the workstations to look for the license on the server (usually done automatically via network broadcast or can be configured manually in Tally settings: F1 (Help) > Settings > License > Manage License).
Key Considerations & Troubleshooting
Performance: If performance is slow, consider:
Installing TallyPrime Server components.
Ensuring the data folder is on an SSD on the server.
Data Path: Consistency in using the UNC path (\\ServerName\TallyData) on all clients is crucial.
Permissions: Ensure both Share and NTFS permissions are correctly set for Tally users on the data folder.
License Server: Verify workstations can communicate with the Tally License Server running on the main server machine.
Properly configuring Tally ERP/TallyPrime on your Windows Server ensures that your Tanzanian team can efficiently manage accounts, inventory, and compliance tasks within a stable and secure multi-user environment.
Frequently Asked Questions (FAQs) about QuickBooks/Tally Server Setup
Q1: Do I need the most expensive server to run QuickBooks or Tally?
A: Not necessarily. The key is appropriate resources. A moderately priced server with sufficient RAM (16GB+) and fast SSD storage for the data files will often outperform a more expensive server with slow traditional hard drives for these specific applications. It’s about smart configuration, not just raw power. I help you choose cost-effective hardware that meets the performance needs.
Q2: Can I run both QuickBooks and Tally on the same server?
A: Yes, technically you can install and run both on the same Windows Server, provided the server has enough resources (RAM, CPU, disk space) to handle both workloads simultaneously. However, ensure permissions and firewall rules are configured correctly for both applications without conflict.
Q3: What if I already have my company file on a shared drive, but it’s slow/unreliable?
A: This often happens when sharing from a standard workstation or an improperly configured server. Migrating the setup to a properly configured Windows Server environment, following the steps outlined above (especially regarding QBDSM/Tally Server components, permissions, and firewalls), can usually resolve these performance and reliability issues.
Get Your Accounting Software Running Smoothly: Contact Israel Ngowi
Setting up QuickBooks Desktop or Tally ERP for multi-user access on a Windows Server requires careful attention to detail – from folder permissions and firewall ports to specific application configurations like QBDSM or Tally Server components. Getting it wrong leads to frustration, errors, and lost productivity.
As your local Tanzanian expert, I, Israel Ngowi, can handle the technical complexities of setting up both QuickBooks and Tally ERP correctly on your Windows Server, ensuring a stable, secure, and efficient environment for your critical financial data.
Stop battling software errors and performance issues. Get a professional setup today!
Is a software engineer with a B.Sc. in Software Engineering. 100k+ blog posts visits per month
He builds scalable web apps, writes beginner-friendly code tutorials, and shares real-world lessons from the trenches.
When he’s not debugging at 2 a.m., you’ll find him mentoring new devs or exploring New Research Papers.
Connect with him on LinkedIn (24) ISRAEL NGOWI | LinkedIn.
"JESUS IS THE WAY THE TRUTH AND THE LIGHT"