Address
Arusha Njiro
Work Hours
80 Hours A week
Address
Arusha Njiro
Work Hours
80 Hours A week

 ByIziraa
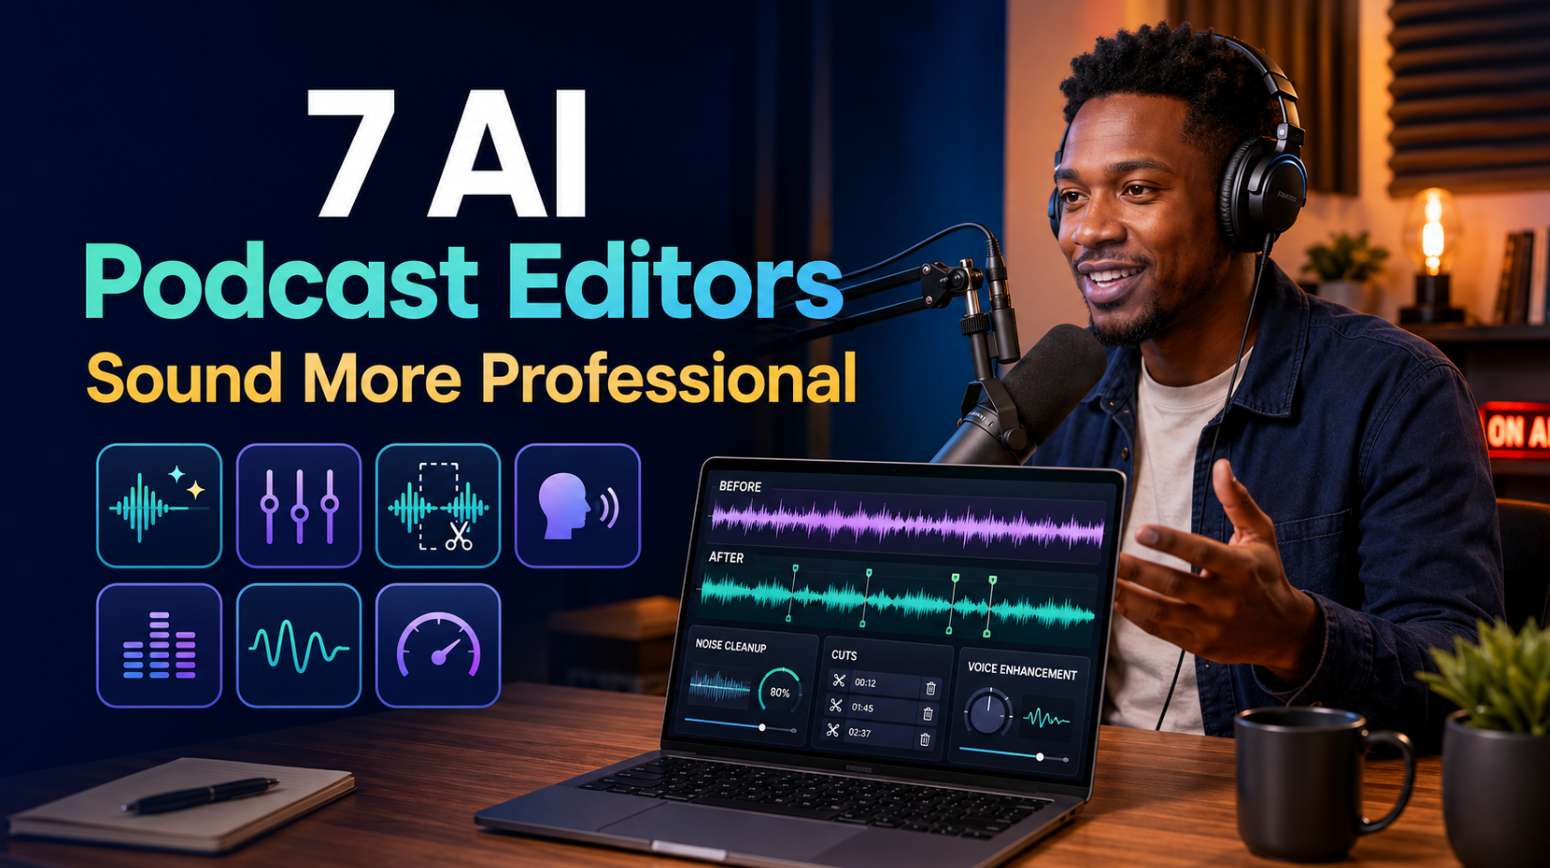
The best AI podcast editors for beginners solve a practical problem: your ideas may be strong even when your room, microphone technique or editing skills are not. Fortunately, an AI editor can reduce background noise, balance uneven voices, find long silences and let you remove mistakes through a transcript. As a result, a first programme can sound clearer without requiring months of audio-engineering practice.
However, “professional” should not mean robotic. A good edit makes the speaker easier to hear while preserving personality, emphasis and natural conversation. Therefore, the goal is not to delete every breath, pause or filler word. Instead, the goal is to remove distractions that stop listeners from following the story.
For most beginners, Descript is the strongest overall choice because its transcript-based editor makes structural editing feel familiar. Adobe Podcast is the easiest choice for one-click speech cleanup, while Riverside works best when remote recording and editing need to happen in one place. Meanwhile, Auphonic is particularly strong as an automatic mastering stage after the main edit is complete.
Quick recommendation: Record the cleanest audio you can, make the story edit in Descript, Riverside, Adobe Podcast, Alitu or Podcastle, and then check the final sound on headphones and an ordinary phone speaker. If loudness and speaker balance remain inconsistent, use Auphonic for mastering. Above all, preview every automatic cut before publishing.
| Tool | Best use | Beginner advantage | Main caution |
|---|---|---|---|
| Descript | Complete transcript-based editing | Edit audio by editing text | Heavy enhancement can sound processed |
| Adobe Podcast | Fast speech enhancement | Very simple browser workflow | Cleanup is not a complete story edit by itself |
| Riverside | Remote recording and editing | One workflow for guests, edits and clips | Best features depend on the plan |
| Auphonic | Final mastering and loudness | Strong automatic levelling | It cannot choose the best story structure |
| Cleanvoice | Removing verbal distractions | Focused automatic cleanup | Batch deletion may remove meaningful pauses |
| Alitu | Guided production and hosting | Little technical setup | Higher fixed cost for occasional creators |
| Podcastle | Accessible recording and creation | Broad browser-based toolset | AI effects still need careful listening |
Features, limits and prices change. Therefore, confirm the provider’s current plan before paying. Free access may also limit minutes, exports, resolution, downloads, AI credits or commercial features.
Above all, professional audio is not simply loud audio. First, the voice should be understandable without forcing the listener to raise the volume repeatedly. Second, different speakers should feel reasonably balanced. Third, noise and echo should not compete with the conversation. Finally, cuts should preserve the meaning and rhythm of what people said.
In practice, five improvements create most of the perceived difference:
AI helps most with the third and fourth items. Nevertheless, it cannot fully compensate for poor preparation. For example, a guest recorded across a room, a microphone that clips on every loud word or an interview without a clear purpose will remain difficult to rescue.
Consequently, spend ten minutes improving the recording before spending an hour repairing it. Next, close windows, silence notifications, move away from a bare wall and place the microphone consistently. If possible, record a 30-second test and listen through headphones. As a result, this small check often prevents the biggest editing problems.
Descript changes the mental model of audio editing. Instead of finding every mistake on a detailed waveform, the beginner can edit a transcript. For example, delete a sentence from the text and the corresponding audio disappears. Therefore, someone comfortable with a document editor can make a useful first cut without learning a traditional digital audio workstation immediately.
Descript also combines several jobs that beginners commonly perform in separate apps. Its current podcasting tools include multitrack editing, transcription, Studio Sound, filler-word removal, recording rooms and AI-assisted editing. In addition, its official guide explains that its AI assistant can identify filler words, remove retakes, tighten rambling sections and add chapter markers.
For example, imagine a 35-minute interview with a strong answer at minute 24. A traditional beginner may hesitate to move it because the waveform feels unfamiliar. In Descript, however, the editor can locate the words, move the paragraph and listen across both edit points. As a result, story editing becomes less intimidating.
Still, automatic cleanup is not automatic judgement. Some filler words soften disagreement, hold a conversational turn or show that a guest is thinking carefully. Likewise, an aggressive Studio Sound setting can make one voice feel detached from the room. Therefore, process a short section first and compare it with the original.
Descript offers a free starting plan, while paid plans increase media hours, AI credits and export options. Because plan names and allowances can change, check Descript’s current pricing page before making a buying decision.
Best for: Beginners who want one workspace for transcript editing, cleanup, recording and repurposing.
Less suitable for: People who want detailed manual control over every frequency, effect and mix decision.
Adobe Podcast is one of the easiest ways to hear an immediate improvement in spoken audio. Its Enhance Speech tool reduces background noise and echo, while Adobe Podcast Studio can record, transcribe and edit audio or video in the browser. Consequently, a beginner can start without installing a complicated desktop application.
Moreover, the transcript editor is especially approachable. Each word follows the audio, so a creator can cut, copy and paste spoken sections much like text. Adobe also provides Mic Check to identify recording-setup problems before the real conversation begins.
Adobe’s free plan currently permits shorter Enhance Speech files and limited Studio downloads. By contrast, Premium adds longer processing, video support, bulk uploads and control over speech, music and ambience. The exact allowances appear on the official Adobe Podcast plans page.
The enhancement strength deserves attention. Adobe itself notes that maximum processing can sometimes sound unnaturally perfect. Therefore, do not assume that 100% is automatically the best setting. A lower level may preserve more room character, breath and warmth.
Moreover, enhancement is not the same as editing. Adobe Podcast may make a weak section clearer, but it does not decide whether the section deserves to remain. The human editor must still remove repetition, protect context and shape the episode around the listener’s needs.
Best for: Beginners who want fast voice cleanup with minimal technical setup.
Less suitable for: Detailed music production or advanced manual mixing.
Riverside is most compelling when the podcast begins as a remote interview. It records separate participant tracks, then brings transcription, text-based editing, silence and filler-word removal, audio enhancement, clips, show notes, hosting and publishing into the same workflow. As a result, the creator avoids moving a large project through several unfamiliar programmes.
In particular, separate tracks matter. If one guest is quiet while the host is loud, a single mixed file limits what an editor can repair. Separate recordings, however, make it easier to balance speakers and remove a problem from one track without damaging another.
Meanwhile, Riverside’s free plan provides a limited entry point, including editing tools and a one-off allowance for separate-track recording. By contrast, paid plans expand recording downloads, quality, AI editing, transcriptions and publishing features. Since the pricing page may display monthly and annual options differently, confirm the total annual commitment before subscribing.
For beginners, Riverside reduces hand-offs. Nevertheless, that convenience can encourage people to accept the first AI edit. Listen to the complete episode after using automatic silence removal. Otherwise, a thoughtful pause may disappear, two speakers may appear to interrupt each other or a joke may lose its timing.
Riverside is also useful for creators who plan social distribution. In that case, its clips can support the same wider workflow described in Iziraa’s guide to AI tools for social media managers. Even so, a short clip needs human context; the most dramatic sentence is not always the fairest representation of the guest.
Best for: Remote interviews, video podcasts and creators who want recording, editing and distribution together.
Less suitable for: Audio-only creators who already have a reliable recorder and only need final mastering.
Auphonic is different from a typical story editor. It specialises in post-production: levelling speakers, reducing noise and reverb, improving frequency balance, setting loudness targets and preparing consistent output files. Therefore, it often works best after the creator has already removed unwanted sections.
Its Intelligent Leveler balances differences between speakers, music and speech. In addition, Auphonic supports loudness specifications, multitrack processing, noise reduction, AutoEQ, filler-word cuts, transcripts, chapters and automated publishing. These features make it powerful, although a beginner can still use a simple preset.
Auphonic currently provides two free processing hours per month. However, free productions include an Auphonic jingle, and unused free hours do not accumulate. Paid recurring or one-time credits remove that restriction and support more production time; the details are listed on Auphonic’s official pricing page.
Auphonic can now remove fillers, coughs and silences, yet its greatest beginner value remains final sound consistency. For instance, a creator can make the narrative decisions in Descript and then use Auphonic to balance and master the export. Consequently, the two tools can complement rather than replace each other.
Do not run the same strong denoising and compression in several tools without comparison. Repeated processing can produce metallic voices, pumping ambience or missing syllables. Instead, keep an untouched original, change one stage at a time and compare at normal listening volume.
Best for: Final levelling, loudness normalisation, noise control and repeatable mastering.
Less suitable for: Rearranging an interview or making nuanced story decisions from a transcript.
Cleanvoice focuses on the small verbal distractions that make editing slow. It can detect filler words, unusually long silences, stutters and mouth sounds in audio or video. Therefore, a beginner can clean a conversation without manually hunting through every minute.
This focused design is useful for spoken interviews, educational recordings and business podcasts. It is also convenient when a virtual assistant receives a finished recording and needs to prepare a cleaner draft for review. Iziraa’s list of AI tools for virtual assistants provides a broader stack for managing the related research, scheduling and promotion work.
Cleanvoice currently offers a free test and credit-based paid options. Its official pricing page should be checked for the latest minute allowances and currencies.
However, the greatest risk is over-cleaning. Natural speech contains hesitation, breath and rhythm. Moreover, a pause may signal emotion, uncertainty or a transition between ideas. Removing it blindly can change how a listener interprets the person. Consequently, use automatic removal to create suggestions, then restore anything that protects meaning.
A useful rule is to remove distraction, not humanity. Delete a filler when it repeatedly interrupts comprehension. However, keep it when the sentence sounds abrupt without it or when it carries conversational meaning.
Best for: Fast cleanup of fillers, silence, stutters and mouth sounds.
Less suitable for: Building a complete episode with music, narrative structure and detailed mixing.
Alitu is designed for people who want podcast production without becoming audio technicians. It combines recording, automatic cleanup, mixing, text or waveform editing, filler-word and silence removal, music, transcription, hosting and publishing. As a result, a beginner can move from idea to published episode in one guided environment.
Above all, the workflow is Alitu’s main advantage. A creator does not need to decide which specialist tool should handle each stage. Instead, the platform prepares and connects the steps. This can be valuable for a teacher, consultant or small-business owner whose real job is the conversation rather than audio production.
Alitu currently advertises one all-in-one plan at $38 per month, with a seven-day trial and a discount for annual billing. Nevertheless, prices can change, so confirm the total on the official page before subscribing.
That fixed cost makes the most sense when the creator publishes regularly and uses several parts of the workflow. Conversely, someone producing one short episode every few months may get better value from a free editor and pay-as-needed mastering.
Alitu also reduces technical choices, but it cannot remove editorial responsibility. The creator must still obtain guest permission, check names and claims, select music with appropriate rights and listen to the export. For a small organisation choosing between several subscriptions, Iziraa’s guide to AI tools for small businesses offers a useful bottleneck-first approach.
Best for: Beginners who want the clearest guided route from recording to hosting.
Less suitable for: Occasional podcasters who do not need an ongoing all-in-one subscription.
Podcastle combines recording, transcript-based editing, audio enhancement, noise reduction, silence removal, filler-word detection, transcription and creator tools in a browser-based workspace. Consequently, it suits beginners who want to experiment with both audio and video without adopting a traditional editing suite.
For instance, its Magic Dust enhancement is designed to remove background noise, balance levels and polish a voice with one action. Furthermore, its text-based editor can identify fillers and pauses so the editor can review them without searching a waveform manually.
Podcastle uses plans and AI credits, while the exact allowances vary by tier. Therefore, examine Podcastle’s current pricing page according to recording hours, enhancement needs and exports rather than choosing by the headline price alone.
As with every one-click enhancer, the before-and-after sample matters more than the marketing label. A voice may become clearer but less natural. Similarly, aggressive pause removal may create breathless pacing. Thus, test the same 60-second passage at different settings and choose the least processing that solves the problem.
Podcastle is a broad tool, which is useful at the beginning. However, growing teams may later prefer a specialist recorder, editor or mastering service. That is not a failure; it simply means the workflow has developed more precise needs.
Best for: Beginners exploring browser-based audio, video, transcript editing and enhancement.
Less suitable for: Advanced engineers who need precise control over every processing stage.
First, do not choose by the longest feature list. Instead, identify the stage that repeatedly causes trouble.
| Your main problem | Best starting choice | Why |
| “I do not understand waveforms” | Descript | Transcript editing feels like revising a document |
| “My room makes my voice sound distant” | Adobe Podcast | Enhance Speech provides fast browser-based cleanup |
| “I interview remote guests” | Riverside | Separate recording tracks and editing share one workflow |
| “Each speaker has a different volume” | Auphonic | Intelligent levelling and loudness mastering are core strengths |
| “Removing fillers takes too long” | Cleanvoice | It specialises in verbal and silence cleanup |
| “I want one guided system” | Alitu | Recording, editing, hosting and publishing are connected |
| “I want a broad browser creator tool” | Podcastle | Recording, enhancement and transcript editing sit together |
If you remain uncertain, use the same two-minute sample in two or three free trials. Include speech, a pause, a louder phrase, a quiet phrase and some ordinary room noise. Then compare the outputs blindly if possible. In other words, choose the result you prefer rather than the interface with the most impressive promises.
First, write the episode’s central question, intended listener and desired outcome. Next, prepare a short opening, five to seven prompts and a closing action. As a result, this structure reduces rambling before editing begins.
If AI helps with preparation, use it as a questioning partner rather than a source of invented expertise. Iziraa’s guide to ChatGPT prompts for an easier working day shows how context and constraints improve practical prompts.
First, record 30 seconds in the actual room. Then listen through headphones and the device most listeners will use. If the voice is distant, move closer to the microphone before adding an AI effect.
Next, save untouched local copies of every speaker track. Moreover, label the files with the date, episode and speaker. Since AI tools make mistakes, the original recording remains the recovery point.
First, remove off-topic sections, repeated answers, interruptions that add nothing and obvious recording failures. Then arrange the remaining material in the clearest order. At this stage, focus on meaning rather than perfect sound.
Next, apply noise reduction, filler removal and silence shortening to a short sample. Afterwards, compare it with the original. If words become metallic, clipped or rushed, reduce the effect.
Once the content is settled, balance speakers and apply final loudness processing. Auphonic can automate this stage; alternatively, use the controls provided by the chosen all-in-one editor.
Above all, do not rely only on the transcript. Instead, listen at normal speed for missing words, strange transitions, abrupt cuts and music that overwhelms speech. Also test the programme on an ordinary phone speaker because many listeners will not use studio headphones.
Check the guest’s name, role, organisation, links and any factual claims included in the show notes. In addition, confirm consent for recording and publishing. If the discussion contains client, student, patient or workplace information, remove or anonymise it appropriately.
Next, create a labelled draft and share it with the responsible reviewer or guest when agreed. Only after approval should the creator prepare the final file, transcript, clips and publication materials.
Finally, keep the original tracks, final master, transcript, artwork, music licence and approval record together. Consequently, future corrections or short clips will not depend on an old cloud project remaining available.
Use this short test after every AI-assisted edit:
If one answer is no, return to the last safe version. Professional editing is often less processing, applied more carefully.
Some fillers are distractions. Others, however, preserve timing or soften a reply. Bulk removal without review can make speakers collide or sound unnatural.
Strong denoising may remove room sound, but it can also remove parts of the voice. Therefore, use the lowest setting that creates a clear improvement.
Running heavy noise reduction in three tools rarely creates triple quality. Instead, it can amplify artefacts and make speech tiring to hear.
A transcript hides tone, laughter, overlap and silence. Consequently, every important cut needs an audio check.
Studio headphones may hide problems that appear on a phone or inexpensive earphones. Accordingly, test at least two common listening devices before release.
A podcast editor may upload recordings, create transcripts and retain project files according to its plan and policies. Therefore, read the provider’s current privacy and retention information before uploading sensitive material. This matters especially for research interviews, student conversations, employee discussions and unpublished client work.
Before processing a recording:
For a broader distinction between chat history, memory, training controls and deletion, read Iziraa’s ChatGPT privacy and safer-use guide. Although each podcast platform has its own policies, the central habit remains useful: share only the data needed for the task.
Music also requires care. A track found online is not automatically free to use. Consequently, use original music, a properly licensed library or material whose terms clearly permit podcast distribution. Save the licence record with the episode files.
Finally, do not clone a guest’s voice or generate replacement speech without explicit permission. Even where a tool offers the feature, transparency and consent remain essential.
Most beginners do not need subscriptions to all seven tools. In fact, overlapping services can create more logins, more uploads and more opportunities to lose the latest version.
This bottleneck-first approach also applies to blogging. If the podcast supports a WordPress site, Iziraa’s guide to AI tools for WordPress bloggers can help turn an approved transcript into an article, featured image and promotion plan without buying duplicate tools.
Create four one-minute tests in different rooms and microphone positions. Afterwards, compare noise, echo and voice distance. Choose one repeatable setup and document it.
Record a five-minute solo episode. Then remove one false start, move one paragraph and shorten one long pause. Most importantly, listen across every edit point.
Process the same two-minute sample with two tools. Keep notes on clarity, naturalness, speed and export limitations. Consequently, the decision will rest on evidence rather than advertising.
Produce one short episode from beginning to end. Next, ask three listeners to rate voice clarity, pacing, volume consistency and usefulness. Use their specific feedback to adjust the second episode.
Do not aim for a flawless first release. Instead, build a production system that can improve without exhausting the creator.
Descript is the strongest general starting point because transcript editing makes audio changes easier to understand. However, Adobe Podcast may be simpler when the only problem is noisy or echoing speech. Meanwhile, Alitu is more suitable for someone who wants a guided recording-to-hosting workflow.
AI can reduce noise, echo and uneven levels. Nevertheless, it cannot reliably restore severely clipped speech, a missing track or words buried under loud competing sound. Better recording conditions remain the strongest first improvement.
Several tools provide free access, limited trials or monthly allowances. Descript, Adobe Podcast, Riverside, Auphonic, Cleanvoice and Podcastle all offer some form of entry access at the time of writing. However, the restrictions differ, so verify minutes, exports, watermarks, jingles and commercial use before starting a full episode.
No. Remove fillers that repeatedly distract or obscure meaning. Conversely, keep natural hesitation when deleting it damages rhythm, emotion or conversational timing.
Auphonic now includes several cutting and transcript-related features, but its clearest strength is automated post-production and mastering. Therefore, many beginners will use it after completing the main story edit elsewhere.
Riverside is the strongest choice in this list when separate remote tracks, transcript editing, clips and publishing belong in one workflow. Still, test the guest’s microphone and internet setup before the interview.
Yes, but the transcript should be treated as source material rather than an instant article. First, verify the transcript, remove private details and identify the reader’s question. Then create an original structure, add context and confirm every factual claim. Beginners can review How to Use ChatGPT for Beginners and Iziraa’s guide to making AI writing sound more human before repurposing an episode.
The best AI podcast editors for beginners are the ones that remove a real production barrier without removing the speaker’s humanity. Descript offers the strongest overall editing environment, while Adobe Podcast makes speech cleanup unusually accessible. Riverside is the better fit for remote interview production, and Auphonic is the strongest final mastering specialist in this group.
Cleanvoice is valuable when fillers and silence consume editing time. Meanwhile, Alitu provides the clearest guided all-in-one route, and Podcastle gives new creators a broad browser workspace for audio and video. Nevertheless, no tool deserves automatic trust simply because it uses AI.
Record carefully, preserve the originals, edit meaning before sound and preview every automated change. Ultimately, a professional podcast is not one with every imperfection erased. It is one that listeners can hear comfortably, follow easily and recognise as a genuine human conversation.